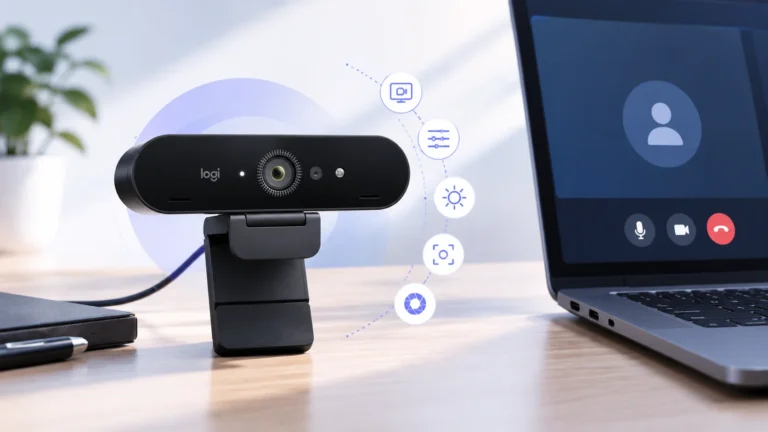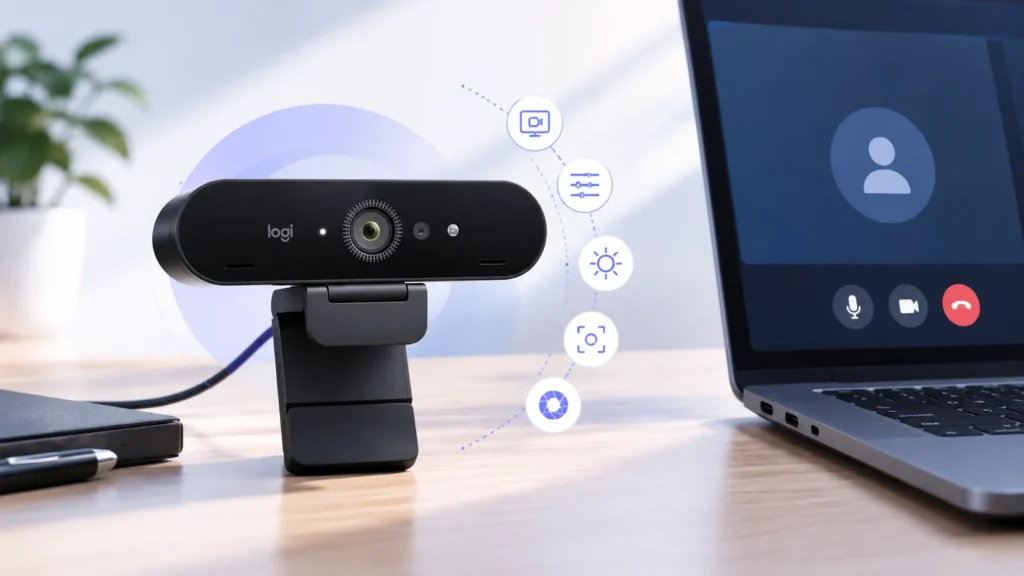

Hey, Brio user! Did you just connect your Logitech Brio and find yourself wondering which software you actually need, where the camera settings are, or why the picture does not look the way you expected?
We know that getting a new webcam working is usually easy, but getting the right settings can be confusing. You may have a working camera but still not know how to change the field of view, adjust the brightness, fix the colors, or get the framing right. Do not worry. You are in the right place. This DigiRadars guide will walk you through the setup and show you what to adjust without making the process more complicated than it needs to be.
The good news is that Logitech Brio can work as a plug-and-play webcam without additional software for basic use. If you want more control over the camera, supported Logitech software can give you access to settings such as field of view, zoom, brightness, color, and other image controls.
Ready to get your Brio working and looking right? Follow the guide below from the initial connection to the final camera adjustments, and you will know exactly what to check at each step.
Quick Answer: How to Set Up Logitech Brio Software
To set up Logitech Brio, connect the webcam to your computer and first confirm that it works in your normal camera application. You do not need additional Logitech software for basic webcam use.
If you want to adjust the camera, install the Logitech software supported by your Brio model. Open the camera controls and adjust the field of view, zoom, brightness, color, and focus while checking the live preview.
If the software cannot detect your Brio, check the USB connection, camera permissions, and software compatibility before reinstalling anything. Logitech also recommends checking the connection and troubleshooting through Windows or macOS when the webcam is not detected.
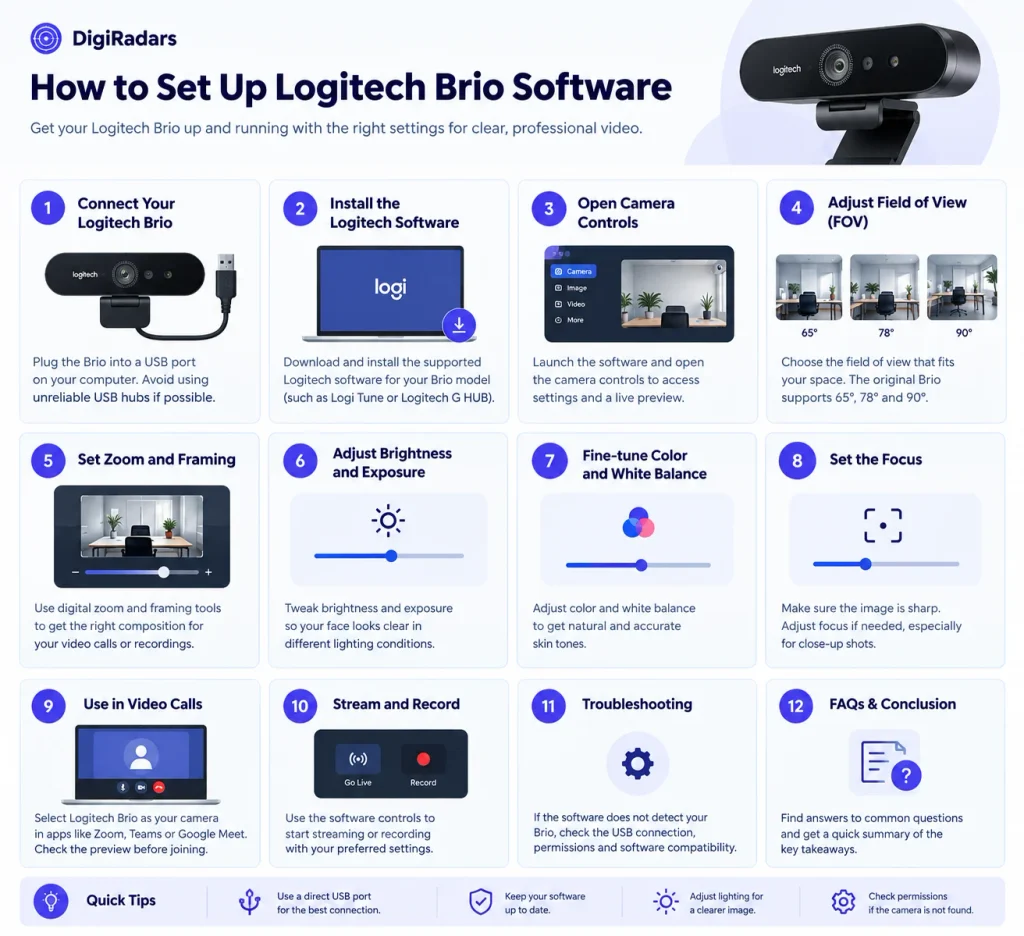
1. Connect Your Logitech Brio
Before installing any Logitech software, get the Brio connected and make sure the basic camera connection is working.
Step 1: Position the Brio
Place the webcam on top of your monitor or another stable surface. Keep the camera roughly at eye level so you can check the framing properly later.
Step 2: Connect the USB Cable
Connect the USB cable to the Brio and plug the other end directly into your computer.
For the first setup, avoid using a USB hub, extension, or adapter if possible. A direct connection makes troubleshooting easier if the computer does not recognize the camera.
Step 3: Wait for Your Computer to Detect It
Give Windows or macOS a few moments to recognize the webcam. Logitech Brio is designed as a plug-and-play UVC webcam, so basic camera use does not require additional Logitech software.
Step 4: Check the Camera
Open your computers built-in camera application and look for Logitech Brio as the selected camera.
If you can see a live picture, the basic connection is working. You can now move on to the Logitech software if you want to change camera settings.
Step 5: Do Not Install Software Yet If You Only Need Basic Camera Use
If Brio already works and you only need it for normal video calls, you can use it without installing additional Logitech software.
If you want to change settings such as field of view, brightness, color, or other supported controls, continue to the next step.
2. Install Logitech Software for Brio Settings
If your Brio is already working, you do not need Logitech software for basic camera use. Install it when you want to change settings that are not available through your normal video application.
Step 1: Check Your Brio Model
Before downloading anything, confirm which Brio model you have. Logitech has several Brio webcams, and software support can vary between models.
You can usually find the model information on the webcam, its packaging, or the Logitech support page for your device.
Step 2: Download the Supported Logitech Software
Go to the official Logitech support or product page for your Brio model and check which software Logitech currently lists for it.
If you want to find the relevant downloads without searching through different pages, you can also visit our Logitech Brio software downloads section. We have collected the relevant software and tools there to make the setup process easier.
For the original Brio, Logitech specifically lists Logi Tune for adjusting settings such as color, brightness, field of view, and zoom.
Step 3: Install the Software
Download the installer from Logitech and complete the installation on your computer.
Avoid downloading an old Brio utility from an unrelated website simply because an older guide recommends it. Logitech support notes that some older tools, including its Firmware Update Tool, are no longer supported or maintained.
Step 4: Open the Logitech Software
Once the installation finishes, open the Logitech application and make sure the Brio is connected.
Look for your webcam in the device list. If the software detects Brio, open its camera controls and check the live preview.
If the webcam does not appear, do not start changing random settings or reinstalling everything. Check the connection and software compatibility first.
Step 5: Keep the Software Only If You Need the Controls
You do not need to install multiple Logitech applications just to use the webcam.
If Brio works normally and you are happy with the picture, you can leave the setup as it is. If you want to change the framing, brightness, color, zoom, or other supported controls, keep the software installed and continue to the camera settings below.
3. Open the Logitech Brio Camera Settings
Once the software recognizes your Brio, do not change several settings at once. Start with the live camera preview so you can see what each adjustment actually does.
Step 1: Select Your Brio
Open the Logitech software and select your connected Brio from the available devices.
If the webcam appears in the software, you are ready to adjust its supported camera controls.
Step 2: Open the Camera Controls
Look for the webcam or camera settings area. The exact layout can vary depending on the Logitech software and Brio model.
You may see controls for things such as field of view, zoom, brightness, color, exposure, and focus.
Step 3: Check the Live Preview
Look at yourself in the preview before changing anything.
Check how much of your upper body and background is visible. Also look at your face, lighting, colors, and focus. This gives you a useful starting point before making adjustments.
Step 4: Change One Setting at a Time
Start with the framing. Adjust the field of view or zoom and check the result.
After that, move to brightness, exposure, color, or focus if the image needs further adjustment.
Changing one setting at a time makes it much easier to understand what improved the picture and what made it worse.
Step 5: Check the Result in Your Actual Video App
The Logitech preview is useful, but the final test should be done in the application where you plan to use Brio.
Open your video meeting, recording, or streaming application and make sure Logitech Brio is selected as the camera. Then check whether the framing and picture still look right.
Once the basic framing is set, you can fine-tune the Brio field of view and zoom.
4. Adjust the Brio Field of View
The field of view controls how much of the scene your Brio captures. If your face looks too close to the camera or too much of the room is visible, this is the first setting to adjust.
Step 1: Find the Field of View Setting
Open the Brio camera controls and look for Field of View or FOV.
On the original Logitech Brio, Logitech lists three options: 65°, 78°, and 90°. The available controls can vary by model and software.
Step 2: Start With the Narrower View
Choose 65° and check the preview.
This gives you a tighter frame, which can work well when you mainly want your face and shoulders visible. It can also reduce how much of your surroundings appears behind you.
Step 3: Try 78° If You Need More Space
Move to 78° if the 65° view feels too tight.
You will see more of the area around you while still keeping the frame relatively focused on you. This can be useful when you want a little more background without making the shot feel too wide.
Step 4: Use 90° for a Wider Frame
Choose 90° when you want more of your surroundings in the picture.
This can make sense for presentations, demonstrations, or situations where showing more of the room is useful. If your background becomes distracting, move back to a narrower FOV.
Step 5: Check Your Position Before Using Zoom
Do not immediately use digital zoom to fix a framing problem.
First, adjust your seating position or move the webcam if possible. Then use FOV to get the composition close to what you want. This usually gives you more control over the overall frame than relying heavily on digital zoom.
Once the FOV looks right, the next adjustment is zoom if you still need to fine-tune the framing.
5. Adjust Zoom and Camera Framing
If the FOV is close to what you want but your face still looks too small or too large in the frame, use the zoom control for the final adjustment.
Step 1: Check Your Current Framing
Look at the live preview and check where your face sits in the frame.
Try to keep your face naturally positioned without cutting off the top of your head or leaving excessive empty space around you.
Step 2: Adjust the Zoom Slowly
Increase the zoom if you need a tighter frame. Reduce it if too much of the scene is being cropped.
The original Brio supports up to 5x digital zoom, although the controls available to you can depend on the software and webcam model.
Step 3: Do Not Rely on Maximum Zoom
You do not need to use the highest zoom level simply because it is available.
A small adjustment is often enough to bring the framing closer to what you want. If you have to zoom in heavily, check whether moving the webcam or changing the FOV would give you a better composition.
Step 4: Check the Background
After adjusting the zoom, look at the edges of the frame.
Make sure unwanted objects are not becoming the main focus and that you still have enough room to move naturally during a call or recording.
Step 5: Check the Result in Your Video App
Open the application where you will actually use the Brio and check the camera preview again.
If the framing looks natural there, leave the zoom where it is. You can now move on to brightness and exposure if the image itself needs adjustment.
6. Fix the Brio Picture When It Looks Too Dark or Bright
Once the framing looks right, check the brightness of your face. A good frame can still look poor if the camera is struggling with the lighting in the room.
Step 1: Check the Light First
Look at where the main light is coming from.
If a bright window or lamp is behind you, Brio may have difficulty keeping your face properly exposed. Before changing software settings, try moving the light in front of you or changing your position.
Step 2: Check the Exposure Setting
Open the image controls and look for Exposure if your software provides it.
If your face looks too dark, increase the exposure gradually and check the preview. If your face looks washed out or the bright areas lose detail, reduce it.
Do not make a large adjustment immediately. Small changes make it easier to see how the picture responds.
Step 3: Check Brightness
If a separate Brightness control is available, use it for smaller image adjustments.
For example, if the exposure looks acceptable but the overall picture still feels slightly dark, a small brightness adjustment may be enough.
Step 4: Check the Background
After changing the exposure, look at both your face and the background.
The goal is not simply to make your face brighter. A setting that makes your face look better can also make a bright window or light source appear completely washed out.
Step 5: Test the Picture Again
Move slightly or change your position and watch the preview.
If the picture changes dramatically whenever you move, the lighting may be the bigger issue rather than the software setting. Try improving the light before making further camera adjustments.
Once the brightness looks natural, you can move on to color and white balance.
7. Adjust Color and White Balance
If the Brio picture looks too warm, too blue, or simply does not match the lighting in your room, check the color and white balance controls.
Step 1: Look at Skin Tones
Start with your face in the live preview.
If your skin looks unusually orange or yellow, the image may be too warm. If it has a noticeable blue or gray cast, it may be too cool.
Step 2: Check the White Balance
If your Logitech software provides a White Balance control, adjust it while watching the preview.
Make small changes until white objects in the frame look reasonably white and your skin tone looks natural.
Step 3: Compare the Picture With Your Room
Look away from the screen for a moment and check the actual lighting around you.
A camera can make the same room look different from what your eyes see. This is especially noticeable under warm indoor bulbs or mixed lighting.
Step 4: Avoid Chasing Perfect Color With Mixed Lighting
If you have daylight coming through a window and a warm lamp behind you, the camera may struggle to make the entire scene look consistent.
When possible, use one main type of light. This can give you a more predictable result than repeatedly changing the white balance.
Step 5: Check the Final Preview
After adjusting the color, look at your face, clothing, and background again.
If the image looks natural without an obvious blue, yellow, or orange cast, leave the setting there. You can then move on to focus and the remaining camera controls.
8. Adjust Focus and Other Camera Controls
With the framing, brightness, and color set, check whether your face stays sharp when you move. The available focus and image controls can vary depending on your Brio model and Logitech software.
Step 1: Check the Focus
Look at your face in the live preview and make a small movement.
If the camera quickly brings you back into focus, autofocus is doing its job. If your face stays soft or the camera keeps searching for focus, check whether a focus control is available in your software.
Step 2: Check Autofocus Behavior
Do not change focus settings just because the option is available.
For a normal video call where you remain in one place, stable autofocus may be all you need. If you regularly move closer to the camera or show objects in front of it, pay closer attention to how the focus responds.
Step 3: Check the Image Controls
Look through the remaining image controls available for your Brio.
You may find options for image appearance or other camera adjustments. Change only the setting that addresses a visible problem rather than changing several controls at the same time.
Step 4: Move Naturally in Front of the Camera
After making an adjustment, move your head slightly or change your position.
Watch how the camera responds. A setting that looks good when you are completely still may behave differently when you move during a call or recording.
Step 5: Keep the Changes That Actually Improve the Picture
Compare the new picture with your original preview.
If the adjustment makes the image clearer or more consistent, keep it. If it makes the picture look unnatural or causes the camera to behave worse, return to the previous setting.
Once the camera looks good while you move naturally, you can set it up specifically for video calls or other situations where you plan to use the Brio.
9. Set Up Brio for a Video Call
Once the main camera adjustments are done, check how the Brio looks in the video app you actually use. Settings that look good in the Logitech preview can still need a small adjustment once the camera is inside a meeting application.
Step 1: Select Logitech Brio
Open your video meeting application and go to its camera settings.
Select Logitech Brio as the camera and open the preview.
Step 2: Check Your Framing
Look at how your face and shoulders appear on screen.
If your face fills too much of the frame, reduce the zoom or use a wider position. If you are too far away, move the webcam or adjust the framing rather than immediately increasing the zoom.
Step 3: Check the Light on Your Face
Your face should be clearly visible without strong shadows.
If a window or lamp is directly behind you, try changing your position first. A light source in front of you usually makes it easier for the camera to produce a usable image.
Step 4: Check the Background
Look at the edges of the video frame.
Remove anything distracting from the visible area or change the FOV if you are showing more of the room than you need.
Step 5: Make a Short Test
Before an important meeting, use the applications preview or make a test call.
Move naturally, look at the image, and check whether the focus, brightness, color, and framing remain consistent.
Step 6: Leave the Settings Alone Once They Work
If the picture looks natural and the camera stays focused while you move, there is no need to keep changing settings.
The goal is a reliable video-call setup, not a screen full of adjusted numbers.
Logitech Brio Software Troubleshooting
If your Brio works normally but the Logitech software does not detect it, do not immediately uninstall and reinstall everything. First find out whether the problem is with the webcam connection, the operating system, or the Logitech software.
Brio Works in the Camera App but Not Logitech Software
Open your computers camera application and check whether you can see the Brio.
If the video works there, your computer is detecting the webcam. That points more toward a software or compatibility issue rather than a basic USB connection problem.
Check that you are using the Logitech software supported for your specific Brio model.
Brio Is Not Detected Anywhere
If Brio does not appear in your normal camera application either, start with the USB connection.
Disconnect the webcam and connect it directly to another USB port on your computer. If you are using a USB hub, extension, or adapter, remove it for the test.
Logitech recommends checking the physical connection and trying the webcam without a USB hub when troubleshooting detection problems.
Brio Is Detected but There Is No Video
If the webcam appears but the preview is blank, check which camera your video application is using.
Select Logitech Brio manually if another camera is selected. You should also check camera permissions in Windows or macOS.
If another application is already using Brio, close that application and try the camera again.
Some Brio Settings Are Missing
Missing controls do not necessarily mean that the software installation is faulty.
Logitech software features can vary by webcam model. Check the support information for your specific Brio before installing another Logitech application or an older utility.
Logitech Software Still Cannot Find Brio
If Brio is still not detected, Logitech provides further troubleshooting for Windows and macOS, including checking Windows Device Manager or macOS system information.
Avoid downloading an old Brio utility from an unrelated website just because an older guide recommends it. Logitech currently notes that its Firmware Update Tool is no longer supported or maintained.
Frequently Asked Questions
Do I need Logitech software to use Brio?
No. Logitech Brio can work as a plug-and-play webcam without additional software for basic camera use. Logitech software is useful when you want access to supported camera controls.
Which Logitech software should I use for Brio?
The correct software depends on your Brio model and the controls you need. For the original Brio, Logitech lists Logi Tune for camera adjustments such as field of view, color, brightness, and zoom.
How do I change the field of view on Logitech Brio?
Open the supported Logitech camera software and look for the field of view setting. The original Brio supports 65°, 78°, and 90° FOV options.
Why is my Logitech Brio not detected by the software?
First check whether the webcam works in your computers normal camera application. If it does, check the Logitech software and model compatibility. If it is not detected anywhere, check the USB connection and try connecting Brio directly to another USB port.
Can I adjust Logitech Brio settings for video calls?
Yes. When the supported controls are available, you can adjust settings such as framing, field of view, brightness, color, and zoom before using Brio in your video application.
Conclusion
Setting up Logitech Brio is fairly straightforward once you separate basic webcam use from camera customization. Connect the webcam, confirm that your computer recognizes it, then install the supported Logitech software if you want more control over the picture.
From there, you can adjust the framing, field of view, zoom, brightness, color, and focus based on how you use the camera. If something does not work as expected, check the connection and software compatibility before reinstalling tools or downloading older utilities.